Every month we give our exclusive Facebook members group a recipe challenge, where we shine the spotlight on one of our favorite recent recipes and encourage our community of home cooks to prepare it. (Editor’s Note: Fill out this short form and get an invitation to join our exclusive Facebook group.) In the past, we’ve chosen Prosciutto Bread, Summer Blueberry Cobbler, and our Blueberry Cornbread recipes. The most recent recipe to get the star treatment is our Bagel Bread recipe from the newest issue of Cook’s Country magazine.
Behind the Recipes
Recipe Talk with the Brains Behind Our Bagel Bread Recipe
You asked, we answered.
By
Published Oct. 3, 2018.

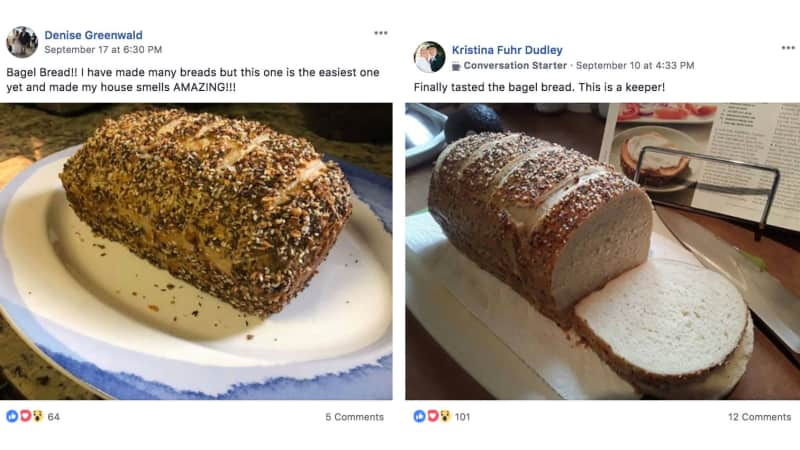
A couple of our Facebook members' final results with the Bagel Bread recipe.
Like always, our members dove right in, posting pictures and comments of their progress for fellow home cooks to see. Along with those lovely posts came a few questions about the process—and baking in general—that we wanted to walk you through. (We don’t want anything getting in the way of you preparing the very best loaf!) So I grabbed the recipe author, senior editor Morgan Bolling, to get some of your important Bagel Bread questions answered. Here’s what she had to say.

Recipe of the Month
Bagel Bread
"This is a fantastic recipe. The best bagel of any kind I have ever had. This will be a permanent recipe in my house." - Kevin, a Cook's Country web member's reviewGet the Recipe
1. Can I pick and choose the toppings, or do I have to include everything called for in the recipe?
We wanted something that was going to pack a lot of punch, so that’s how we ended on this ratio for the topping. Apart from the little bit of salt that’s used to season the interior of the bread, there isn’t much seasoning in this recipe besides what’s included in the topping. (Editor's Note: For the topping we call for 2 teaspoons of sesame seeds, poppy seeds, dried minced garlic, dried onion flakes, and kosher salt.)
The type of salt you use can affect the flavor of the topping. It’s really important for people to make sure they’re using kosher salt. Kosher salt is half as strong as table salt. (Read “Different Types of Salt” to see what one teaspoon of table salt is equal to in kosher and sea salt.) So if someone is using table salt then it would definitely create an issue; the topping will taste way too salty. If you’re salt-sensitive, you can always reduce the salt in the topping. But if you want the flavor that an everything bagel normally comes with we recommend keeping the ratio given in the recipe.
TAKEAWAY: Yes, the ratio in the topping is intentional but feel free to customize it to your liking. If you do decide to use the topping ratio we provide for this recipe, make sure to use kosher salt, as recommended. Using another type of salt can cause your topping to be overly salty.
2. How warm should the water be when you add it to the flour and yeast? Is there a reason it’s not specified in the recipe?
This is a great question and it’s actually one we get a lot for recipes like this. You don’t have to worry about the water’s temperature for instant yeast or rapid-rise yeast. Active dry yeast has a shell on it that needs to be removed in order to make it active; that’s why dough recipes using active dry yeast call for a certain temperature of water. (Editor’s Note: We call for instant or rapid-rise yeast rather than active dry yeast in our Bagel Bread recipe.)
Instant yeast is a little more foolproof because it doesn’t need to be activated. So really, the temperature of the water doesn’t matter. In saying that, we don’t recommend using cold tap water solely because it may take the dough longer to rise than the recommended time given in step 5 of our Bagel Bread recipe. (Read “Yeast 101” to learn more about the differences between the different types of yeast, including cake, active dry, rapid-rise, and instant.)
TAKEAWAY: When using recipes that call for instant or rapid-rise yeast, you don’t need to use water at a certain temperature—although using a warm (not hot) liquid will speed up the initial rise.
3. When a recipe says to let the dough rise until "it" reaches the lip of the pan, which part of the dough is it referring to (the edge or the center)?
When one of our recipes includes this instruction, we’re referencing the center of the dough.
4. This might be the most asked question: How do you get the dough in and out of the boiling water without causing any damage to the dough (or to yourself)?
In the test kitchen, we turn the dough out from the pan onto the counter, then lift it with our hands and gently place it in the boiling water. You have to be very careful with the boiling water but this was the best method we found. We tried using a parchment sling but it just felt very clunky, messy, and we noticed instances where it would stick to the sling, which led to us having to deal with trying to pull the dough out without turning the bread into a mess. To feel like we had control of the dough we found that using our hands was truly the best option.
As for removing the dough from the boiling water, something really big like a spider skimmer that you’d use for frying worked best for us.
Test Kitchen Tips
- If you don’t want to get your hands too close to boiling water then we’d recommend using the spider skimmer or two slotted spoons to lower the dough into the water. Yes, you’ll likely put dents in your dough but that’s okay—at this stage, it won’t be a perfect loaf shape no matter how you add it to the water.)
- Prepare your plate with a clean dish towel before you start boiling your dough. Forty-five seconds of boiling time per side goes by faster than you’d think and if you overcook the dough it won’t rise properly in the oven.
TAKEAWAY: The best way to get the dough into the boiling water is to turn the dough out from the pan onto the counter and use your hands to gently place it in the boiling water. As for getting the dough out of the boiling water, we recommend using a spider skimmer or two slotted spoons.


Images of the boiling step that Bolling took during the recipe development for this recipe.
5. When the recipe says to “cook for 45 seconds per side,” is it only referring to two sides?
Correct! You’re only doing one flip to get each side of the dough cooked. You don’t want the dough to cook for longer than those 45 seconds on each side, otherwise you’ll overcook the dough.
TAKEAWAY: Flip the dough once to cook both sides of the dough for 45 seconds.
6. When you transfer the dough to the pan after the boiling step, how do you know which side of the bread is seam side down?
To find the seam side of the dough that should be placed down in the pan, look for little folds on the corner of the dough where you shaped it in step 4 of the recipe. The other side should look a little more smooth. It’s not going to ruin your bread if you place it in the pan the other way around but it may not rise as cleanly.
TAKEAWAY: The seam side down of the dough will have folds from where you shaped the dough. The seam side up part of the dough will look smoother, without as many indents or marks.
7. Is it normal for my dough to look like a mess once it’s removed from the boiling water?
Yes! When we were creating this recipe there were many instances where we got funny-looking dough after the boiling step. I’m not going to lie, the messy dough made us ask ourselves, “Is this okay? Will anyone else actually do the boiling step if this is how the dough will come out?” We were afraid this funny-looking dough wouldn’t work, but then we put it in the oven and it turned out just as beautiful as the loaves that looked much smoother before being baked.
TAKEAWAY: The dough may look rough after the boiling step, but it is perfectly normal. Once your dough goes in the oven it should spring into shape.
8. Why do we even have to boil the bread?
During the recipe development we skipped the boiling step during one of our tests. It tasted like bread rather than chewy bagel bread. We knew that boiling the dough would be essential.
It’s important that you boil the dough because this step sets the exterior for the bread. Plus, it creates a tighter crumb and gives it a better chew—a bagel chew. It’s a totally weird step and it feels wrong—especially when you’re packing it back into the pan after this process—but trust us! It makes the difference.
TAKEAWAY: The boiling step is vital to giving the bagel bread its chewy texture.
9. What’s the best way for me to keep the bread fresh?
The best way to keep your bread fresh after 24 hours is to store it in the freezer, wrapped in aluminum foil and sealed in a freezer bag.
TAKEAWAY: When in doubt, throw it in the freezer.

2017 IACP Best Baking Cookbook
Bread Illustrated
Bread Illustrated is a fully illustrated handbook with more than 100 meticulously tested recipes that will enable you to bake artisan bakery–quality bread at home.Save 33% Now
If you’re looking for more bread recipes, we’ve got you covered.